|
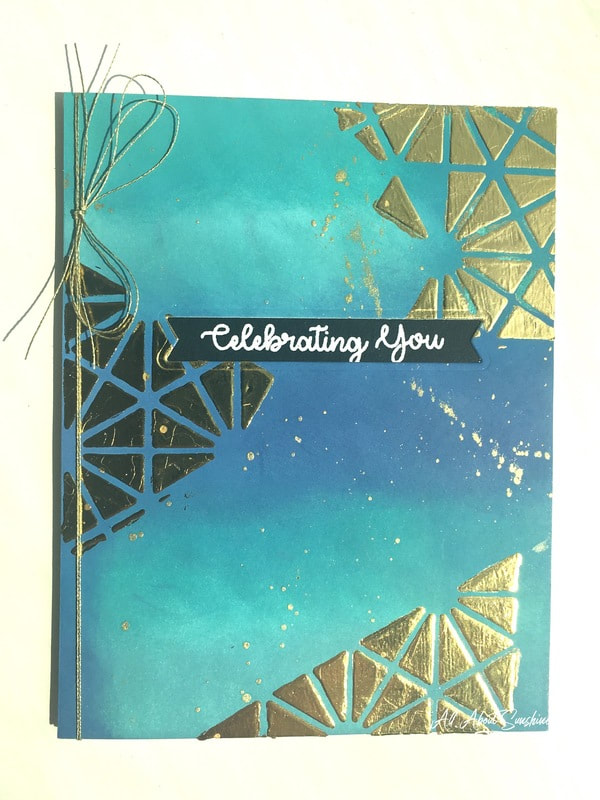
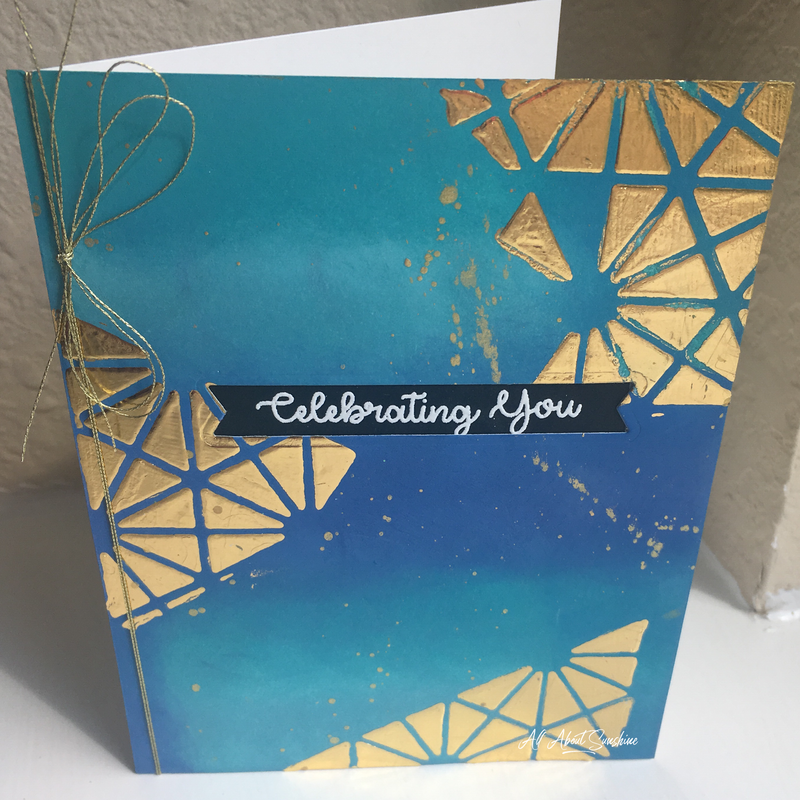
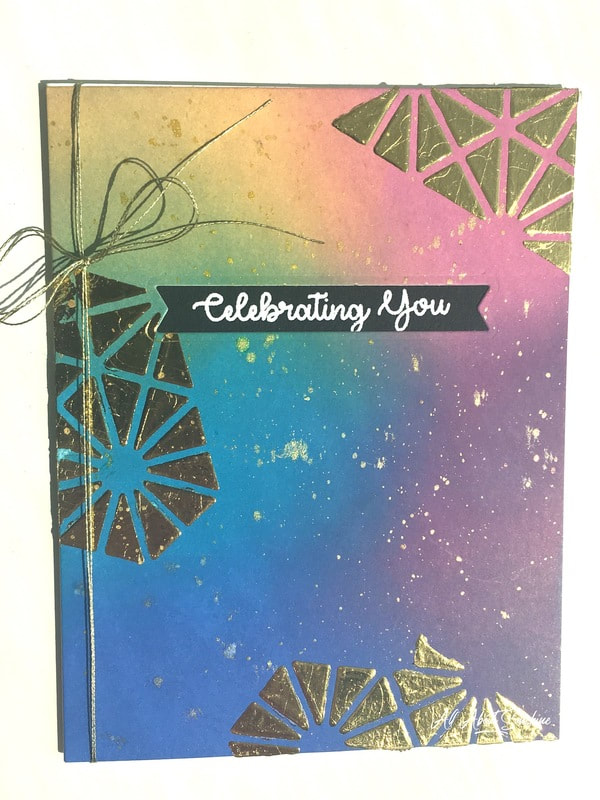
Hello, and welcome to another card idea! I recently purchased my very first background die (!), and decided to use it to make a stencil using some heavyweight cardstock. I love combining stencils with Heidi Swapp Texture Paste...then foiling with my Minc! The results are so beautiful, especially with the Distress Oxide blended backgrounds. Love those blues!!
Supplies:
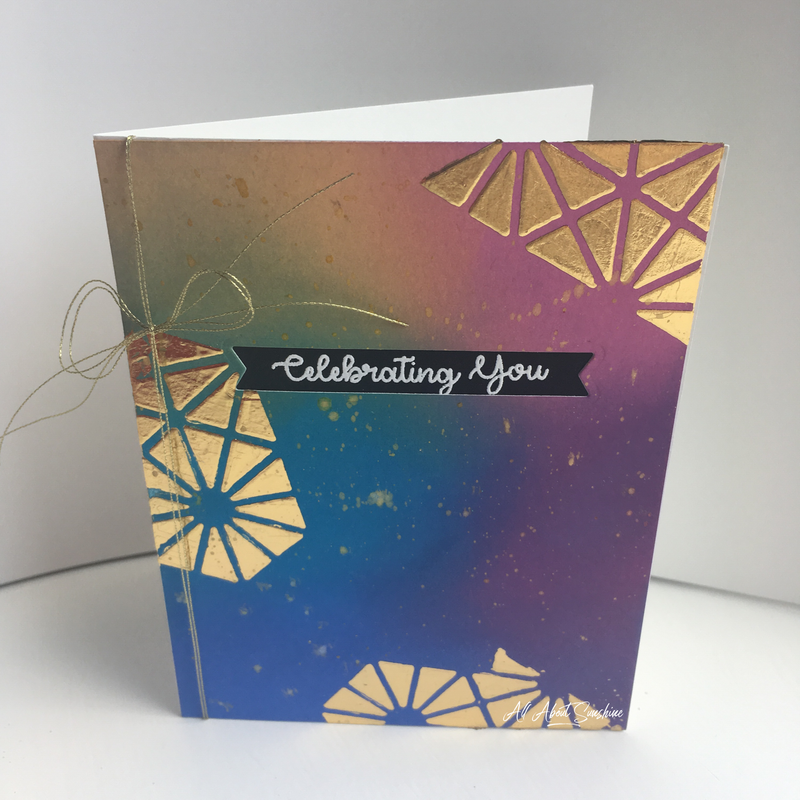
Here is a similar card I made using rainbow colors:
This card uses the same supplies with the exception of the ink colors.
Thanks so much for visiting! I hope you'll try creating your own stencils!
0 Comments
The Love Jar shaker kit by Queen & co. is super cute! When they released matching dies for the stamp set from the kit I was beyond thrilled!!! I am not the fastest cutter... 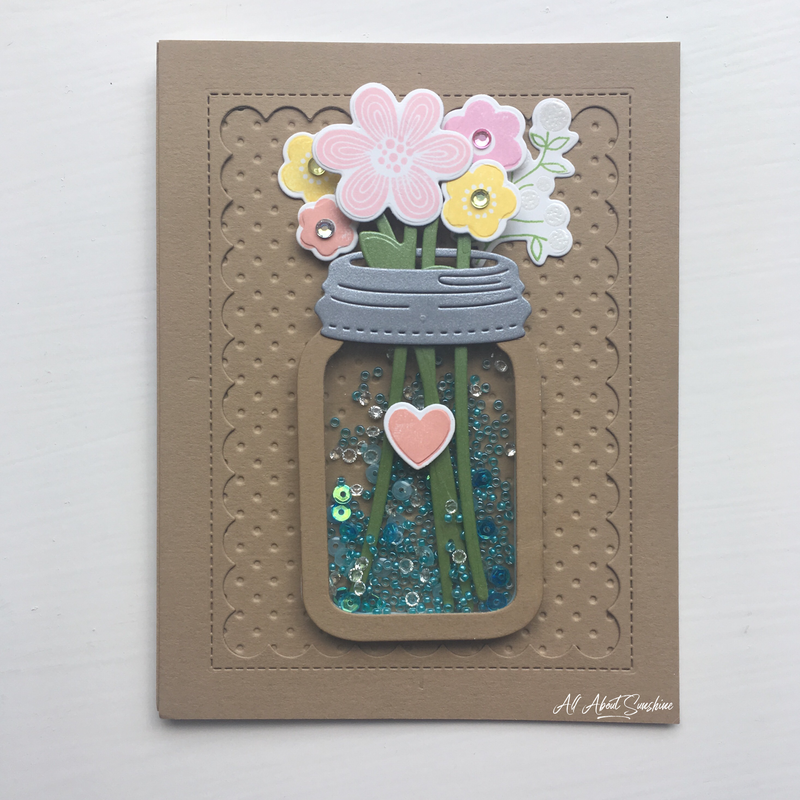 For this card I wanted to have the effect of water in the jar, so I used blue and clear shaker elements. It's so fun to shake, but I had to stop so I could get it in the mail! Compensated Affiliate Links are denoted below with an asterisk "*" at no cost to you. Other, non-Affiliate Links are also provided for your convenience! All supplies were personally purchased, and all opinions expressed are my own. Supplies:
Thanks for visiting! Have a lovely weekend!!
As soon as I saw this Ornate Carousel stamp set from Hero Arts I KNEW I had to make a spinner card! I have zero experience making spinner cards. But now that I've made one, it's so much fun and I can't stop spinning the carousel around and round! 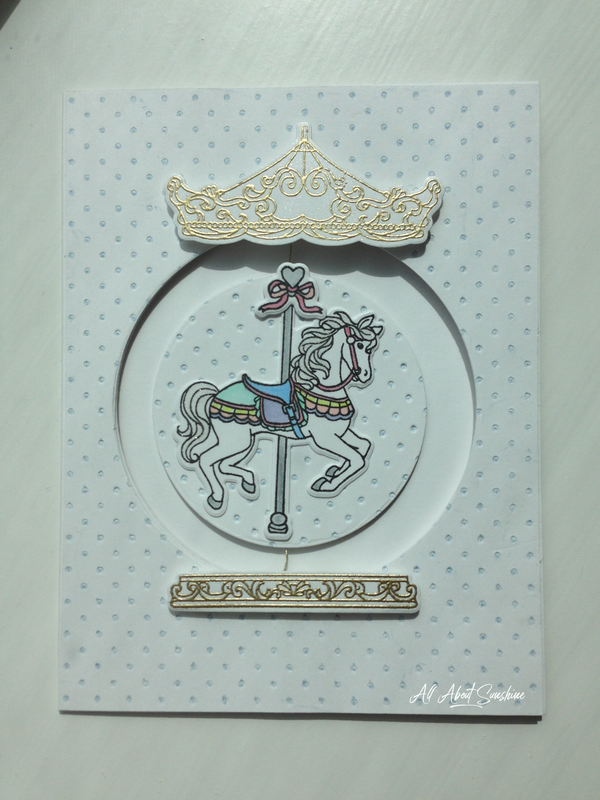 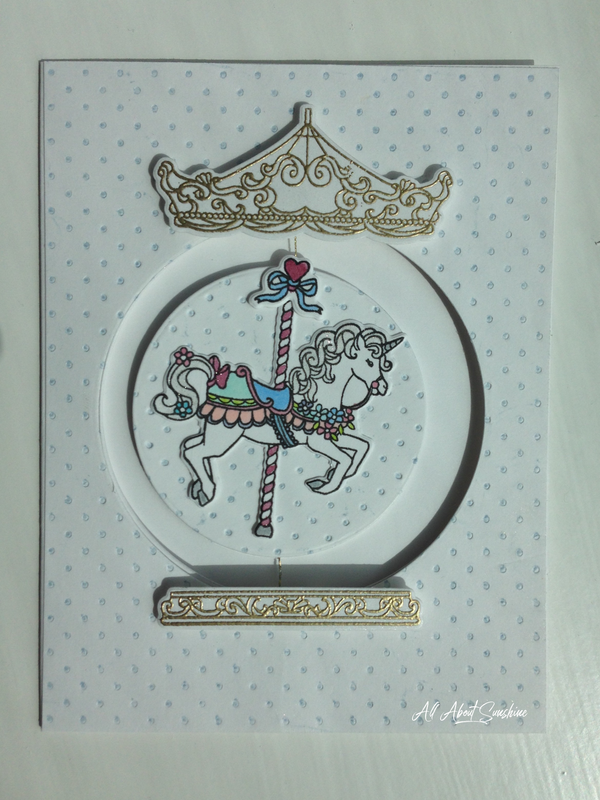 Compensated Affiliate Links are denoted below with an asterisk "*" at no cost to you. Other, non-Affiliate Links are also provided for your convenience! All supplies were personally purchased, and all opinions expressed are my own.
Supplies:
This is my very first spinner card, and since it was so easy and so much fun, I will be making more in the future! To begin, I die cut the horse and the unicorn and stamped the images with black ink. Next, I colored them in using pastel markers and some glitter brush markers. I decided to use the heart and bow carousel topper, so I die cut, stamped, and colored 2 of those as well. For the background, I inked up the Tiny Dots embossing folder with some light blue ink before running it through my Cuttlebug machine. I actually made two of these panels, since I needed 2 circles for my spinning element. I absolutely love the look of this "pin dot" background! Next, I needed to create an opening for my spinning element, so I die cut both the dots panel and my white card base with the medium stitched circle frame from My Favorite Things. I did not use the actual frame, only the negative space and the inside circle. I actually made two of the tiny dot panels, since I needed 2 matching embossed circles for my spinning element. I added adhesive to the back of one circle, laid down some of the gold thread, then placed the other circle on top, creating a sandwich of sorts. Be sure to leave enough extra string on both ends! Here was the hardest part...adding the spinning element to the card base! Tip: Place your string down THEN put the double sided adhesive on top! Unfortunately I put down adhesive on my base and then tried to get the thread to stick, but it wasn't working so well. The idea is to secure both ends of the string to the top and bottom of your card base while lining up the spinning element with it's window. After that you'll want to adhere the dots panel on top, again making a sandwich with the thread in the middle. (Guess I have sandwiches on the brain!) Once your spinner is in place you can adhere the horse and unicorn! To top it off (ha) I heat embossed the carousel top and base with Princess Gold embossing powder, die cut the pieces, spritzed them with sheer shimmer spray, then added them using foam squares. Simply twist your spinning element round and round several times, then tuck into an envelope and when the recipient pulls it out it will magically start spinning just like an actual carousel! :) Or, you could just spin it round and round with your finger, which is also quite entertaining. I hope you'll try making a spinner card soon! It's quite creative and puts a fun twist on your typical card. Have a fun day! My cousin recently tied the knot in Miami, so I made this card to coordinate with the tropical wedding theme. 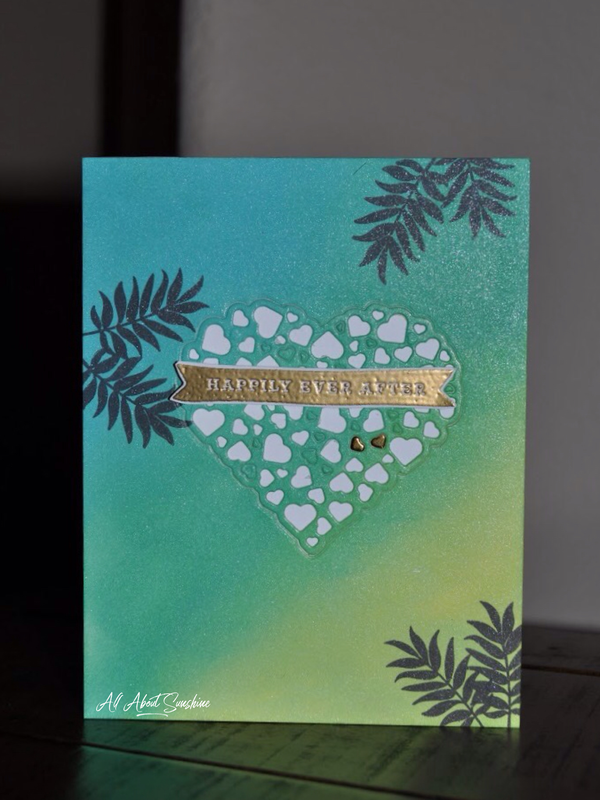 Compensated Affiliate Links are denoted below with an asterisk "*" at no cost to you. Other, non-Affiliate Links are also provided for your convenience! All supplies were personally purchased, and all opinions expressed are my own.
Supplies:
First, I blended the Distress Oxide inks then stamped the palm branches in black ink. Next I added Stick-it adhesive to the back of the panel and die cut with the Gina Marie Designs Heart Collage die. After weeding out most of the tiny hearts, I adhered both the panel and the heart to a card base that is 4.25"x5.5". I heat embossed the Happily Ever After sentiment using gold embossing powder, then fussy cut the image and adhered it to the card using foam squares. I finished the card off by adding 2 tiny foiled hearts leftover from a previous project, as well as spritzing some Sheer Shimmer spray from Tsukineko. The blended oxide inks look especially beautiful with that shimmer spray! This was actually one of my first times blending the oxide inks and it was so much fun! The various colors match up nicely and blend together beautifully. The mini ink blending tool makes blending super smooth and easy! I hope you'll give it a try! Next time you're invited to an event that requires a card, try making something that matches the theme of the event. Thanks for visiting, and have a fantastic day! Hello! This card is super special because I wanted to come up with a way to die cut custom shaker windows without the hassle of spilling my shaker elements while trying to align the shaker window with the card base. Plus, it has some really pretty foiling. :) 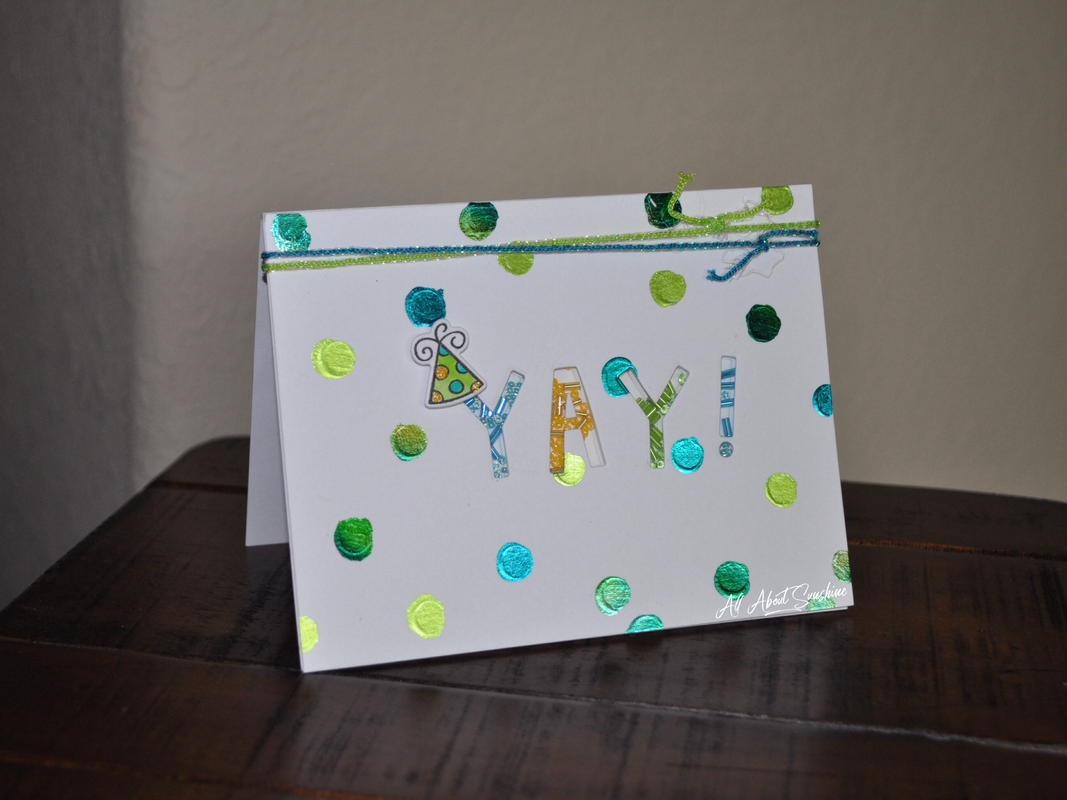 Watch the video below for step-by-step instructions and tips! Supplies:
PLEASE NOTE: I did not show the process of putting the foiled panel through the MINC, but please know that in order to achieve the look of this card you must run your panel through the MINC or a comparable machine to fuse the foil to the paper. Thanks for stopping by! Have a fantastic day! Ice cream is my fave, so when I saw this cute little stamp and mini die set at Michael's for $1 it made my day! Here's the card I designed using the set: 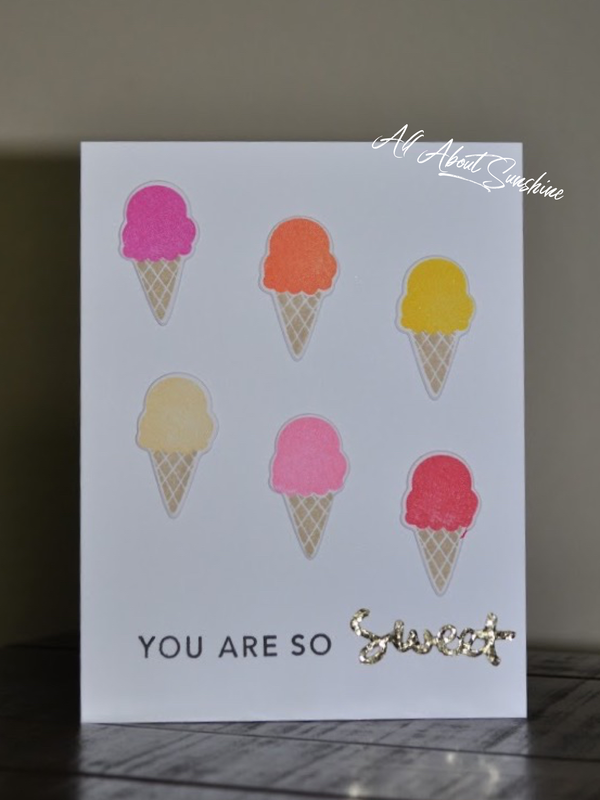 Compensated Affiliate Links are denoted below with an asterisk "*" at no cost to you. Other, non-Affiliate Links are also provided for your convenience! All supplies were personally purchased, and all opinions expressed are my own.
Supplies:
Ranger Dye Ink The Ranger dye inks are amazing, and I'm sad they are on clearance. However, you can still find most of the colors online (try Simon Says Stamp or Ellen Hutson for the ink pads and Scrapbook.com for the refills). I thought it would be nice to showcase the colors side by side so you can see how the actual ink colors compare. These inks produce a clear, crisp image right away, with vibrant colors, and that's what I love about these dye inks from Ranger! The one downfall to this ink is that it can be difficult to clean it off your stamp. I found that the Hero Arts Ultra Clean spray works best. Have a great week! |
aboutAll About Sunshine is living in such a way that you shine brightly and spread joy to those around you. Giving is one of life's greatest pleasures, and I've found that giving something you made is even more heartfelt...not to mention, just plain FUN! Archives
November 2019
Categories |
 RSS Feed